MEMBERSHIP ENROLLMENT (የተጠቃሚ ማስገቢያ)
ETHIOPIAN NATIONAL HEALTH INSURANCE SYSTEM
User Manual and Training Guide
DOCUMENT CONTROL
Created on: 12 July, 2019
Last updated on: 23 October 2019
For updates and corrections, contact mailto:sysadmin@etnhis.org
ABOUT ENROLLMENT
WHAT IS ENROLLMENT?
Enrollment is a periodic event that provides an opportunity for new members to be enrolled into the CBHI schemes, existing members to renew their CBHI memberships and existing members to update their demographic information.
Enrollment is typically carried out once a year during the enrollment window. The membership is typically valid for one year and is called coverage period. A member may be a paying member (pays a certain amount of premium to be a member) or indigent member (pays no premium to be a member). The member may have other dependents in the household who will be beneficiaries of the membership.
ENROLLMENT IN ETNHIS & KEY USERS
In EtNHIS, the enrollment process is enabled through an Android application. The users can enroll new members, renew memberships and amend existing member details through this app.
The enrollment officers are the primary users of the Android app. The enrollment officers can be Kebele managers, Kebele officers, health extension workers or any user delegated by the Kebele.
The main objective of the app is to enable ease of enrollment irrespective of the location – in the Kebele office or in a door-to-door campaign. The app will work even with limited network connectivity.
The app will let enrollment officers take photos of the members, fill in their demographic details, enter the payment related information as well as issue a CBHI QR code card. If there is network connectivity, the enrollment officer can also generate and provide the CBHI ID for the member on the spot.
The web application is primarily for the Branch and Scheme officials to monitor the ongoing enrollment activity. The web app can surface key data points based on which the Branch/Scheme can take specific decisions to improve the effectiveness of the enrollment events.
HOW WILL THIS APPLICATION HELP?
The enrollment officers will be able to collect high quality data from the users including member photographs. The app will assist them in filling out the required fields by highlighting potential errors/omissions and will run the necessary validations to ease the burden of data entry. The app will generate basic reports for enrollment officers to assess their progress during the enrollment events.
For the members, the system will be able to generate the CBHI ID on the spot thereby eliminating the need to visit the kebele office again to pick up their CBHI ID. The members will be able to avail CBHI services within a few days of enrollment as opposed to long wait times when the card is written out by hand.
Digitized enrollment data will be available to the Branch/Scheme in a near real time basis. The data will be of high quality as the system performs validations and data sanity checks during the data entry itself. This will eliminate the need of maintain excel sheets which are unwieldy and time consuming to keep updated.
1. GETTING STARTED
The Membership Enrollment application can be accessed through the Android application installed on the phone.
1.1. To launch the application on your phone, click on the Enrollment app icon

|
Fig 1.1: Enrollment Application |
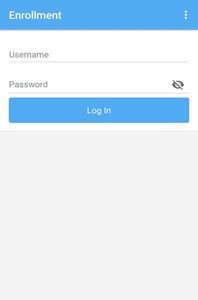
1.2. On launching the application for the first time, enter the username and password.
|
Fig 1.2: Login Screen |
HELP CORNER
If you do not have the application installed on your phone, please contact help desk – contact details provided on the last page of this manual.
To log in to the application, you need an active internet connection. If there is no Internet connection, please wait until the network connectivity resumes and try again.
Each user will be provided with a unique username and password. If you do not have user credentials, please get in touch with the help desk.
TIPS
Click on the eye icon to see the password being entered

Click on the show menu button on the top right corner to change the language and server URL

|
Fig 1.3: Switch Language and Server URL |
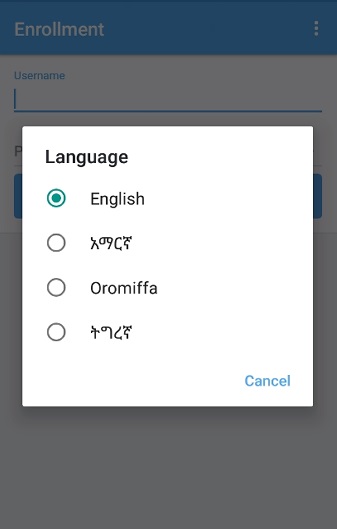
After Selecting switch language, select the language you prefer from the popup dialog list.
|
Fig 1.3.1: Select Language |
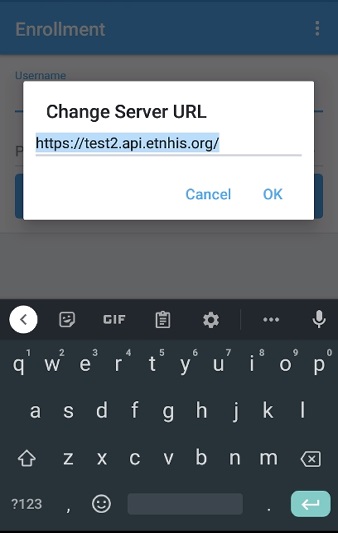
After selecting change server URL, enter the new server URL. Make sure you start with http:// or https://.
|
Fig 1.3.2: Enter server URL |
2. KNOWING YOUR HOME SCREEN
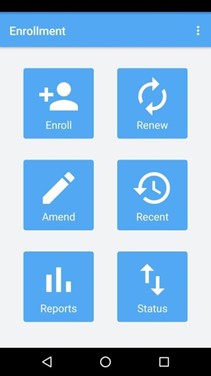
2.1. After completing login, the application will start on the Home Screen. When the application starts for the first time, your Home Screen will be like the following image:
|
Fig 2.1: Home Screen |
2.2. Elements on the Home Screen – 1) Menu 2) New Enrollment 3) Renew Member 4) Amend Member Details 5) View Recent Transactions 6) View Reports 7) View Sync Status
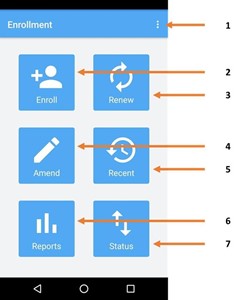
|
Fig 2.2: Home Screen Options |
2.3. With the Menu button, you can a) change password b) view user manual c) change the language d) logout
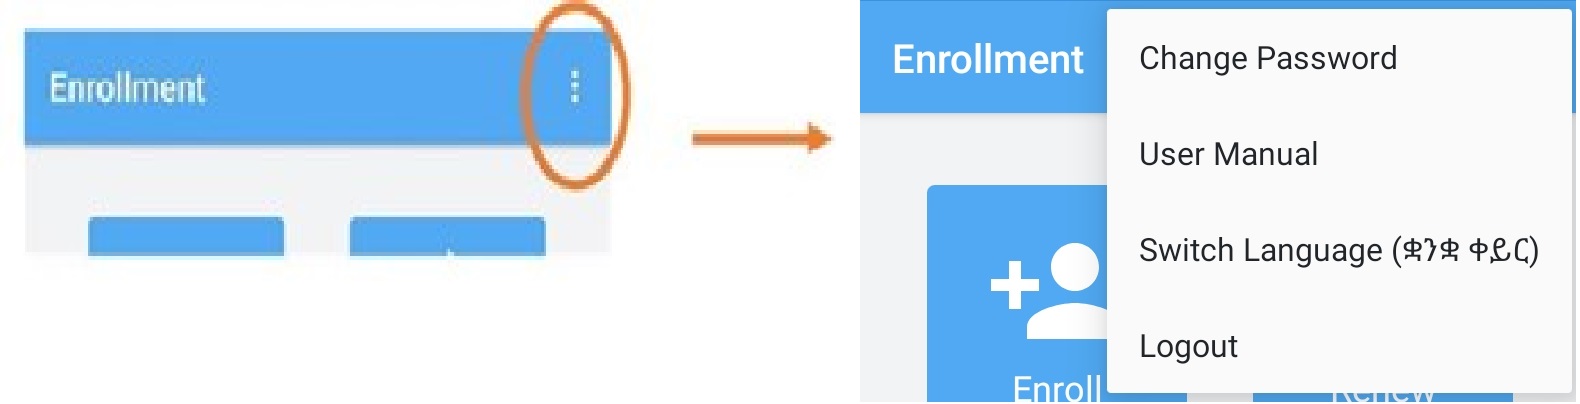
|
Fig 2.2: Menu Options |
2.4. With the New Enrollment button, you can enroll a new household onto the CBHI Scheme. More details are provided in Section 3 – Enroll a New Member.
2.5. With the Renew Member button, you can renew a household in the CBHI Scheme. More details are provided in Section 4 – Renew a Household.
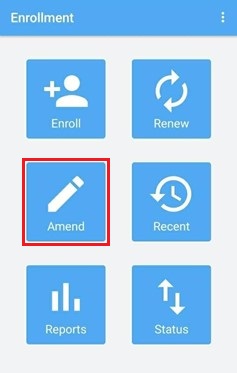
2.6. With the Amend Member button, you can amend/edit/update information of a beneficiary in a household. More details are provided in Section 5 – Amending a Beneficiary. Please note: the beneficiary must exist in the system before amending.
2.7. With the View Recent button, you can see a list of recent transactions done on the device.
2.8. With the View Reports button, you can see the reports relevant to the role logged into the device. More details are provided in Section 6 – Enrollment Reports.
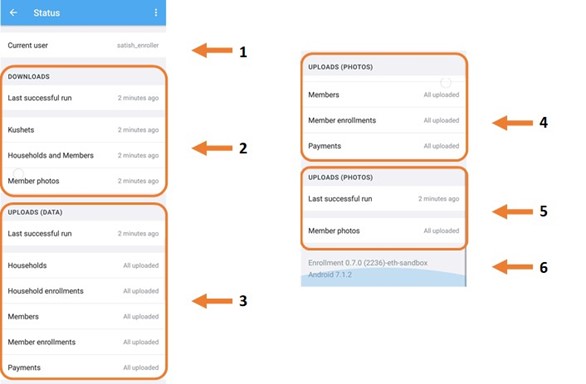
2.9. With the View Sync Status button, you can see the status of the server sync and last sync time. More details are provided in Section 7 – Technical Support.
3. ENROLL A NEW MEMBER
Members who have not previously been enrolled and whose member information is not yet in the system will need to be enrolled as new members.
3.1 Starting a new enrollment
To begin enrollment for a new member, use the Enroll button on the Home Screen.
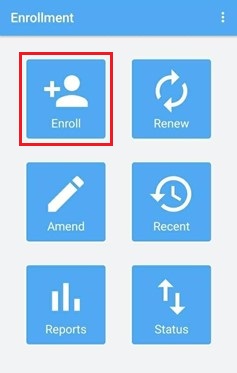
|
Fig 3.1: Enroll Button |
3.2 Entering enrollment information
After launching the New Member screen, begin by entering the enrollment date, Gote/Kushet, and house number (optional).
When you finish entering the information, use the Next button to proceed to the next screen.
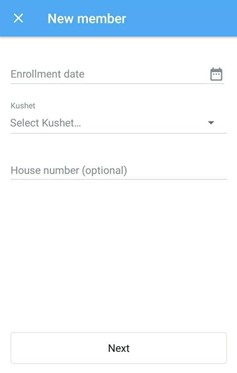
|
Fig 3.2.1: Begin New Member Enrollment |
On the next New Member screen, continue enrollment by entering the information in the fields provided.
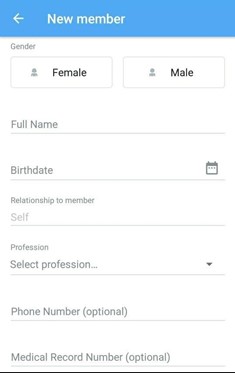
|
Fig 3.2.1: Continue New Member Enrollment |
Once you’ve filled out this information, use the option to scan the QR code of an unassigned ID card to assign this card to the new member.
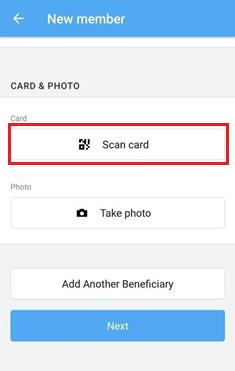
|
Fig 3.2.3: Scan Card |
Use the Take Photo button to take a picture of the new member that can be used later to identify the member when they check in for treatment at a medical facility.
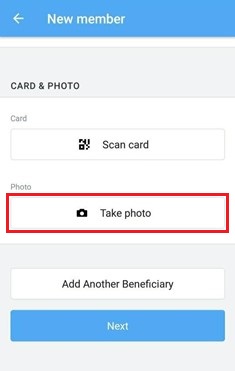
|
Fig 3.2.3: Take Photo |
If the member has no additional beneficiaries being enrolled, you may use the Next button to advance to the Review Membership screen. If there is at least one beneficiary to enroll as part of this household, then use the Add Another Beneficiary button.
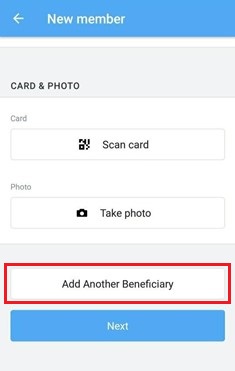
|
Fig 3.2.4: Add Beneficiary |
If you used the Add Another Beneficiary button, you will repeat the above series of screens to allow you to enter information about the beneficiary. Repeat this process as many times as is necessary to add all the beneficiaries to the house that need to enroll.
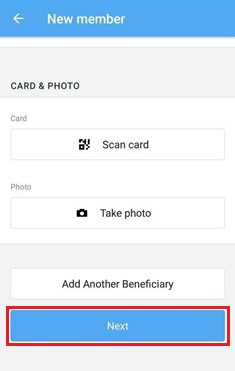
Once you have completed the process for all beneficiaries, use the Next button to advance to the Review Membership screen.
|
Fig 3.2.5: Finish Entering Beneficiary Information |
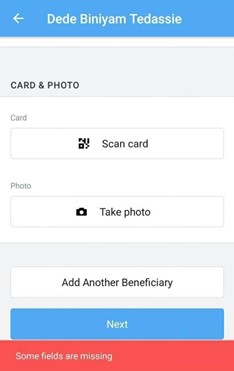
If at any point in the process you attempt to advance by using the Next button and you have not filled in the required information, you will see a warning advising you to complete the missing fields.
|
Fig 3.2.6: Missing Fields |
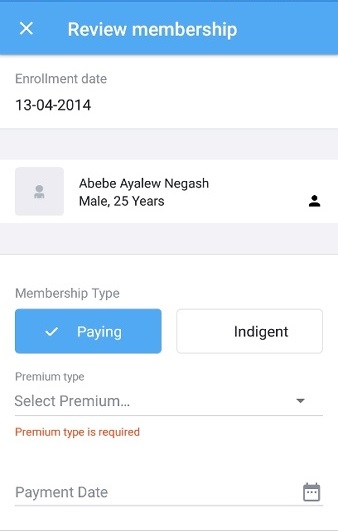
On the Review Membership screen, review the information you entered to ensure it is correct and complete.
|
Fig 3.2.7: Review Membership Information |
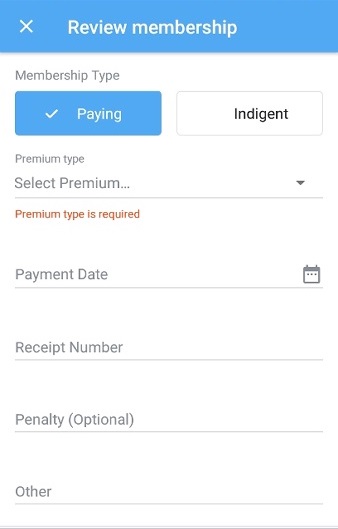
Enter any payment information on this screen, including the premium type, the payment date and receipt number. Enter any penalties that may apply. You may also enter any other amount in the Other field that needs to be included in the payment calculation.
|
Fig 3.2.8: Enter Payment Information |
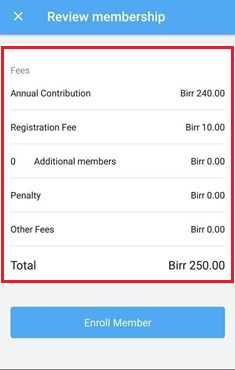
After you have entered all payment information, review the calculations at the bottom of the screen.
|
Fig 3.2.9: Calculation of Fees |
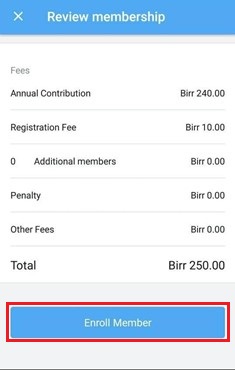
Finish the enrollment process using the Enroll Member button.
|
Fig 3.2.10: Calculation of Fees |
4. RENEW A HOUSEHOLD
Members who previously enrolled and whose household information is already in the system will need renew during each enrollment period to keep their membership active.
4.1 Starting a renewal
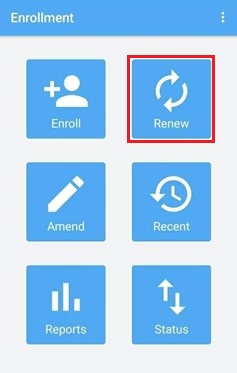
To renew a household, use the Renew button on the Home Screen.
|
Fig 4.1: Renew Button |
4.2 Finding the household
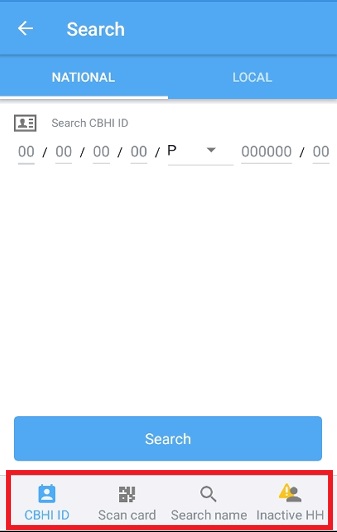
When the renewal screen launches, you have five options available to identify the household renewing.
Find the household needing renewal by entering the CBHI ID, by entering the local CBHI ID, scanning the ID card, searching for the member by name, or clicking inactive households button.
|
Fig 4.2: Finding Household for Renewal |
4.3 Renewing household and adding beneficiaries
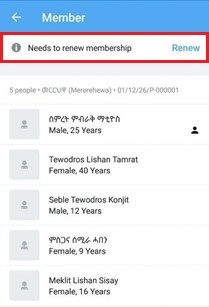
Once found, select the member to bring up the related household. If the household requires renewal, a banner will display near the top of the screen.
|
Fig 4.3.1: Household Needs Renewal |
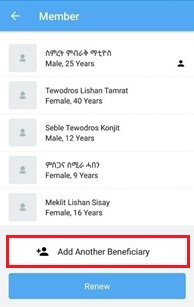
Toward the bottom of the screen, you will see options for adding a beneficiary or renewing the household.
If you need to add another beneficiary, do so by using the Add Another Beneficiary button.
|
Fig 4.3.2: Add Beneficiary |
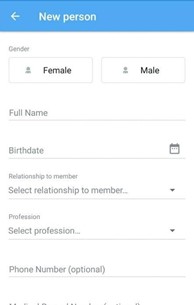
Use the New Person screen to enter in the information about the new beneficiary.
|
Fig 4.3.3: Beneficiary Info |
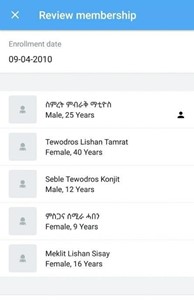
Once you have entered all new beneficiaries or if there are none, use the Renew button to review membership info.
|
Fig 4.3.4: Review Membership |
Scroll down the Review Membership screen to review the member information, to make any changes to the Paying/Indigent status, change premium type, add a replacement membership card, and to enter payment info.
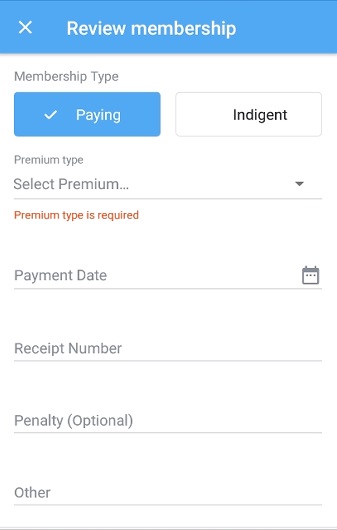
|
Fig 4.3.5: Enter Payment Info |
Once payment info is entered, review the payment information. Then, renew the membership using the Renew Member button.
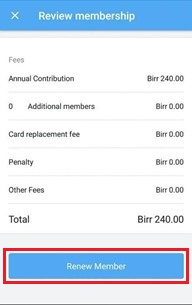
|
Fig 4.3.6: Review Payment and Renew |
If you need to replace a membership card outside the renewal window, search for the member and then use the Pay for Card Fee Replacement button.
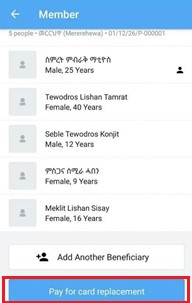
|
Fig 4.3.7: Card Fee Replacement |
Review card replacement payment and use the Confirm Payment button to complete the payment process.
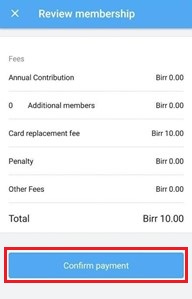
|
Fig 4.3.8: Card Fee Replacement |
5. AMEND BENEFICIARY DETAILS
Members who previously enrolled may need to have their information amended. You can amend beneficiary details within the Android app.
5.1 Start amending beneficiary details
To begin amending beneficiary details, use the Amend button on the Home Screen.
|
Fig 5.1: Amend Button |
5.2 Search for a beneficiary
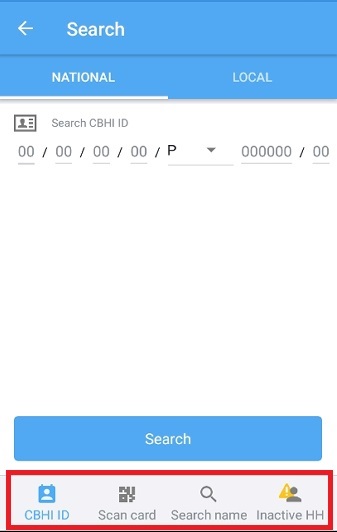
After using the Amend button, the search screen launches to give you five options for searching for a beneficiary.
Find the beneficiary needing amendment by entering the CBHI ID, by entering the local CBHI ID, scanning the ID card, searching by name, or clicking inactive households button.
|
Fig 5.2: Search for Beneficiary |
5.3 Amending beneficiary details
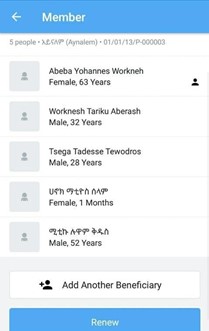
Once you find the beneficiary and select them, you will see the household information.
|
Fig 5.3.1: Beneficiary’s Household Details |
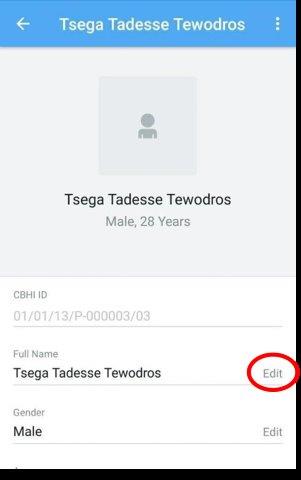
Choose the beneficiary from the list for whom you would like to amend information, then select the beneficiary to open up the beneficiary details for editing.
Use the Edit option next to any of the fields that require amendment.
|
Fig 5.3.2: Amend Beneficiary Info |
When you have made the necessary changes to a particular field, use the Save option to save your changes.
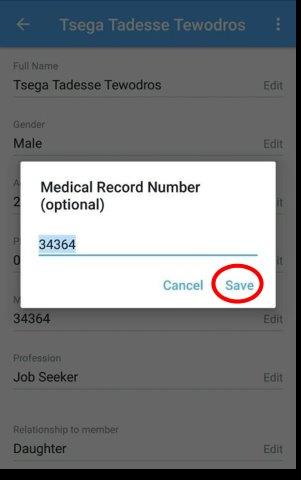
|
Fig 5.3.3: Save Changes |
To edit the Gote/Kushet of a Household click on the Options Menu.
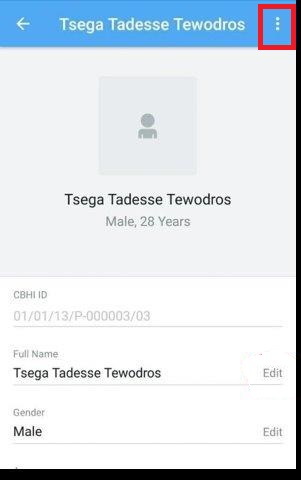
|
Fig 5.3.4: Edit Household Gote/Kushet |
Select the Edit Gote/Kushet option.
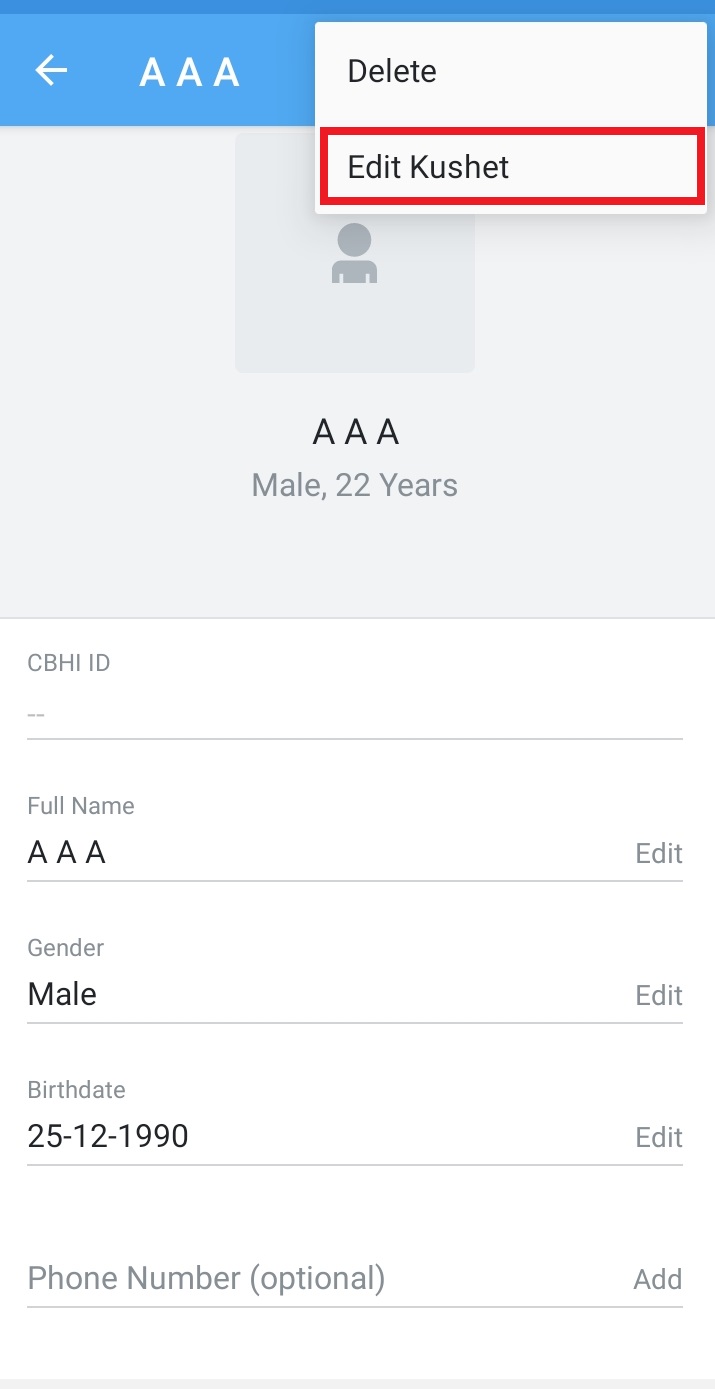
|
Fig 5.3.5: Edit Household Gote/Kushet |
Select the Gote/Kushet you want to change to from the list the click Save.
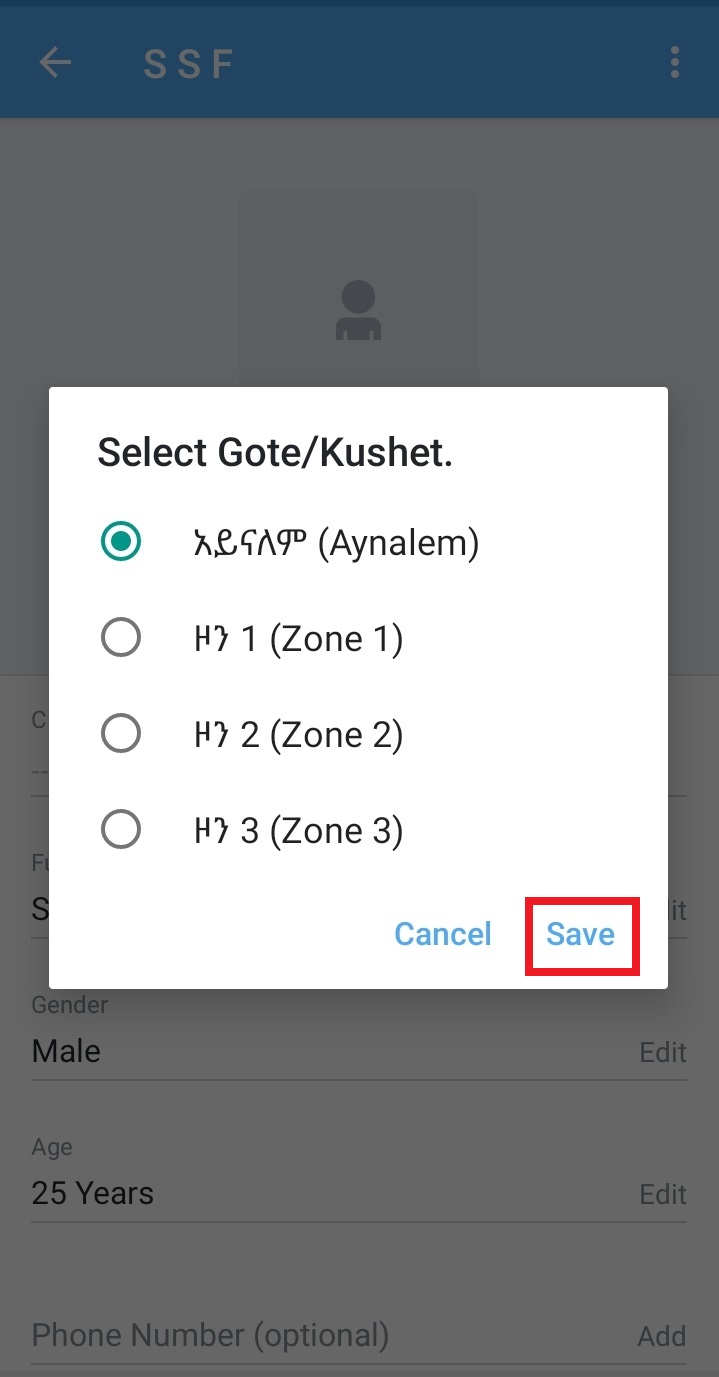
|
Fig 5.3.6: Select new Household Gote/Kushet |
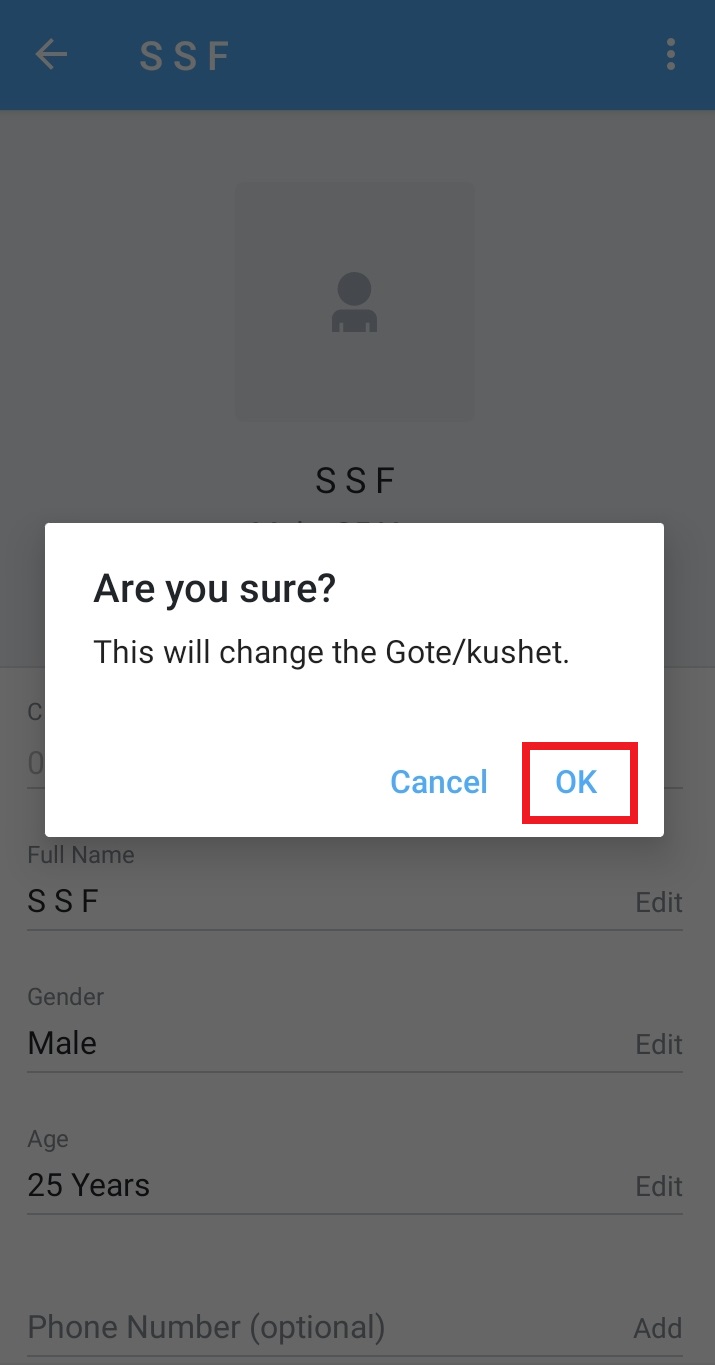
To confirm the Gote/Kushet change click the Ok option.
|
Fig 5.3.7: Confirm Gote/Kushet change |
6. ENROLLMENT REPORTS
6.1 Enrollment Reporting Dashboard (Android)
Module(s): Enrollment
Description: High level enrollment statistics, showing number of enrollments and birr collected; filterable by administrative bounds
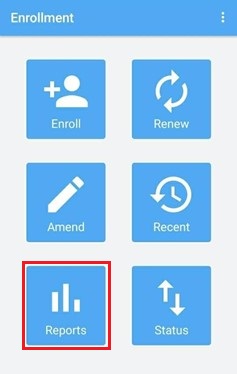
Navigation Path: Log in as enrollment worker > Reports button
|
Fig 6.1.1: Enrollment Reports Android |
.jpg)
|
Fig 6.1.2: Enrollment Reporting Filters (Android) |
.jpg)
|
Fig 6.1.3: Enrollment Reporting Stats (Android) |
6.2 Enrollment Reporting Dashboard (Web)
Module(s): Enrollment
Description: High level enrollment statistics, showing number of enrollments and birr collected; filterable by administrative bounds
Navigation Path: Log in as enrollment worker > Enrollment tab
_Part_1.jpg)
|
Fig 6.2.1: Enrollment Reporting Dashboard (Web) – Part 1 |
_Part_2.jpg)
|
Fig 6.2.2: Enrollment Reporting Dashboard (Web) – Part 2 |
6.3 Enrollment Members Report (Web)
Module(s): Enrollment
Description: Export containing members and beneficiary details of all enrolled within selected administrative bounds per enrollment period
Navigation Path: Log in as enrollment worker > Enrollment tab > Export
.jpg)
|
Fig 6.3: Enrollment Members Report (Export) |
7. TECHNICAL SUPPORT
7.1. Sync Status Screen
|
Fig 7.1: Sync Status Options |
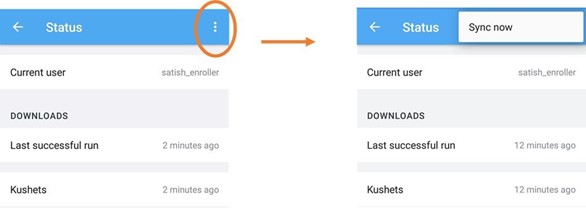
7.2. Perform manual sync
|
Fig 7.2: Manual Sync |
CONTACT
For updates and corrections, contact mailto:sysadmin@etnhis.org